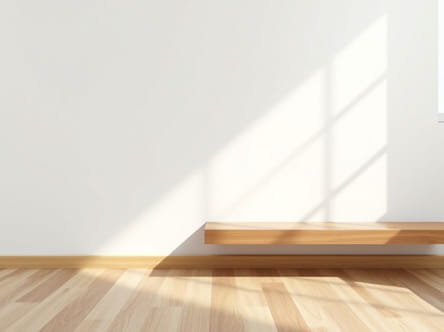
Pon Age Et Vitrification Parquet
Over time, parquet floors may lose their original luster, showing signs of wear, scratches, or dullness. Instead of replacing the entire floor, many homeowners opt forponçage et vitrification parquet, which translates to sanding and sealing hardwood floors. This method not only revives the natural beauty of the wood but also extends the floor’s lifespan and enhances its resistance to daily wear. The process, though technical, is highly rewarding when performed correctly, combining craftsmanship with protection.
Understanding the Basics
What Is Ponçage?
Ponçage, or sanding, involves the removal of the top layer of the wood floor using specialized equipment. This step is crucial for eliminating surface damage, old finishes, stains, and scratches. Sanding levels the floor and prepares it for the next step vitrification.
What Is Vitrification?
Vitrification refers to applying a protective sealant or varnish over the sanded floor. This finish enhances the wood’s appearance and creates a durable surface resistant to foot traffic, moisture, and stains. Common products used in vitrification include water-based polyurethane and solvent-based varnishes.
Why Choose Sanding and Vitrification?
Restores the Natural Beauty of Wood
Over time, parquet can lose its shine and color due to dirt buildup, sunlight exposure, and general use. Sanding removes the worn-out surface and reveals fresh, untouched wood underneath, bringing back its natural charm.
Improves Durability
Vitrification acts as a shield against external damage. The hardened surface protects the parquet from spills, scratches, and impacts, making it more resistant and easier to maintain.
Increases Property Value
Well-maintained parquet flooring adds aesthetic appeal and value to your home. Prospective buyers often appreciate restored wood floors more than worn or carpeted alternatives.
Environmentally Friendly
Instead of discarding old parquet, restoring it throughponçage et vitrificationhelps reduce waste and the need for new materials, contributing to a more sustainable home improvement practice.
The Step-by-Step Process
1. Preparing the Area
Before sanding begins, the room must be cleared of all furniture and decorative items. It’s important to inspect the floor and repair any loose or damaged tiles. Vents and doorways should be sealed to minimize dust dispersion.
2. Sanding the Parquet
Sanding is done in several passes using different grits of sandpaper:
- Rough sanding (3040 grit): Removes the old finish and levels the floor.
- Medium sanding (6080 grit): Smooths out scratches and prepares the surface for fine sanding.
- Fine sanding (100120 grit): Ensures a silky-smooth surface ready for vitrification.
Edges and corners are treated with a smaller edge sander or manual tools to ensure consistency across the entire floor.
3. Dust Removal
After sanding, it’s crucial to thoroughly vacuum and wipe the floor to remove all dust ptopics. Even tiny residues can interfere with the adhesion and appearance of the varnish.
4. Applying the Varnish
The vitrification process typically involves applying three coats of varnish:
- First coat: Acts as a primer and begins sealing the wood.
- Light sanding: Smooths out any raised grain or imperfections.
- Second and third coats: Build up the final protective layer and provide the desired sheen matte, satin, or glossy.
Types of Varnish Used in Vitrification
Water-Based Varnish
This eco-friendly option is low in odor and dries quickly. It provides a clear, non-yellowing finish and is ideal for light wood species. Although less durable than solvent-based versions, water-based varnishes are suitable for most residential settings.
Solvent-Based Varnish
These varnishes offer a more robust and long-lasting finish, making them ideal for high-traffic areas. However, they release more volatile organic compounds (VOCs) and require proper ventilation during application.
Two-Component Varnish
This is the most durable option and is often used in commercial settings. It includes a hardener that must be mixed before application. While more complex to apply, it offers excellent resistance to wear and moisture.
Choosing the Right Finish
Glossy Finish
Provides a high-shine, reflective surface that highlights the wood grain. It’s suitable for formal rooms or modern interiors but may show dust and scratches more easily.
Satin Finish
Strikes a balance between matte and glossy, offering a soft sheen and excellent durability. Satin is the most popular choice for its versatility and ease of maintenance.
Matte Finish
Gives a natural, understated appearance with minimal shine. It’s ideal for rustic or traditional interiors and hides imperfections better than glossier finishes.
Maintenance After Vitrification
Regular Cleaning
Use a soft broom or vacuum cleaner designed for hard floors. Avoid excessive water, and use a damp (not wet) mop for weekly cleaning. Specialized wood floor cleaners are recommended over generic products.
Preventive Measures
- Place felt pads under furniture legs to avoid scratching.
- Use doormats at entrances to reduce dirt and grit.
- Avoid wearing high heels or cleats on the floor surface.
Re-Vitrification
Depending on traffic and wear, floors may need re-vitrification every 7 to 10 years. This process involves light sanding and adding a new topcoat to refresh the surface without fully sanding down to bare wood.
Common Mistakes to Avoid
- Skipping preparation: Not removing furniture or failing to clean dust can lead to poor results.
- Using the wrong equipment: Amateur sanding machines may create uneven surfaces.
- Applying thick coats: Varnish should be applied thinly and evenly to prevent bubbling or cracking.
- Ignoring drying times: Rushing between coats compromises the durability of the finish.
Hiring a Professional vs. DIY
When to DIY
If you have experience with sanding and access to the proper tools, DIY can save costs. It’s suitable for small areas and minor restorations.
Benefits of Hiring a Professional
Professionals bring expertise, efficiency, and access to industrial-grade equipment. For large areas, heavily damaged floors, or premium finishes, hiring a specialist ensures better, long-lasting results.
Investing inponçage et vitrification parquetis one of the most effective ways to rejuvenate your hardwood floors while protecting them for years to come. The process involves meticulous preparation, professional tools, and attention to detail. Whether you choose to tackle the task yourself or hire a skilled artisan, the end result is a beautifully restored surface that enhances the overall ambiance of your living space. With proper care and maintenance, your newly vitrified parquet can remain a centerpiece of your home for decades.