How To Use Glazier Points
Working with glass panes, particularly when setting them into wooden frames, requires a secure method to hold the glass in place before sealing it with glazing compound. This is where glazier points come in. These small metal fasteners are essential for anyone doing window repair, frame restoration, or DIY picture framing. Although they may look simple, understanding how to use glazier points properly is crucial to ensure a stable and long-lasting result without damaging the glass.
Understanding Glazier Points
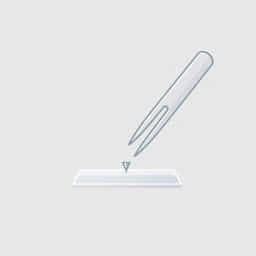
Glazier points are tiny, triangular or diamond-shaped pieces of metal designed to hold glass securely in window frames or picture frames. They are driven into the frame along the edges of the glass to prevent movement during glazing and throughout the life of the window.
There are several different types of glazier points, each suitable for specific uses and tools:
- Push Points: Thin and flat, often inserted manually or with a special tool.
- Diamond Points: Traditional points that require a putty knife or specialized driver.
- Triangle Points: Commonly used in picture frames; easy to insert and remove.
- Point Driver Points: Designed to be inserted using a point-driving gun for precision and speed.
Tools Needed for Using Glazier Points
To properly install glazier points, you will need a few basic tools. The specific tools depend on the type of glazier points you are using. Here’s what you might need:
- Putty knife or flathead screwdriver
- Glazier’s hammer (small and lightweight)
- Point driver tool (for professional use)
- Measuring tape or ruler
- Glazing compound or putty
- Protective gloves and safety glasses
Make sure your work surface is flat and stable, and handle glass with care to avoid injury or breakage.
Preparing the Frame and Glass
Before inserting glazier points, it’s essential to ensure the glass and frame are clean and free of dust or debris. Follow these steps for preparation:
1. Clean the Frame
Wipe down the window or picture frame using a dry or slightly damp cloth. Remove old glazing compound, paint flakes, or broken glass with a scraper or utility knife. Sand the groove lightly if needed to ensure smooth placement.
2. Measure and Cut Glass
If you’re replacing a pane, measure the frame carefully and cut the glass to size. The pane should be slightly smaller than the opening to allow for expansion and easy insertion.
3. Insert the Glass
Place the glass gently into the frame, making sure it sits evenly in the groove. Use spacers if necessary to prevent the glass from touching the frame directly, which can reduce the risk of cracking.
How to Install Glazier Points
Once the glass is in place, it’s time to secure it using glazier points. The method will vary depending on the tools and type of points, but the following general instructions apply:
Manual Insertion with a Putty Knife
This method is best for triangle or diamond points:
- Hold the point against the frame, flush with the glass surface.
- Use a putty knife or flat screwdriver to push the point into the wood at a slight angle.
- Repeat this process every 6 to 8 inches around the perimeter of the glass.
Using a Glazier’s Hammer
Some prefer a small hammer to gently tap the glazier point into the wood. Take extra care not to strike the glass directly. A tapping block can be used to cushion the glass from vibration.
Using a Point Driver Tool
For more frequent or professional work, a point driver speeds up the process and ensures consistent placement:
- Load the driver with compatible points.
- Position the tool flush against the frame and glass.
- Press the trigger to shoot a point into the frame quickly and accurately.
Point drivers are ideal for framing shops or anyone working on multiple frames.
Spacing and Number of Glazier Points
Proper spacing is critical to ensure that the glass remains secure over time. Too few points can result in shifting, while too many can add pressure and increase the chance of breakage.
- Use one point every 6 to 8 inches for large panes.
- Small frames may need only two points on each side.
- Always install at least two points per side for structural balance.
Be consistent in your placement and avoid driving the points too deep, as this can damage the frame or reduce hold strength.
Sealing with Glazing Compound
Once the glazier points are in place, it’s time to seal the glass with a glazing compound. This compound protects the glass edges and holds it tightly in place.
Applying the Compound
- Knead the glazing compound until soft.
- Roll it into thin ropes and press along the edges of the glass and frame.
- Use a putty knife to smooth the compound at a 45-degree angle, forming a clean, beveled seal.
Allow the compound to cure as directed, usually between 7 to 14 days, depending on the product. Paint over the compound if desired for weather resistance and appearance.
Common Mistakes to Avoid
Using glazier points is relatively simple, but there are a few common mistakes that can compromise your work:
- Forcing the point directly against the glass, which can cause cracks.
- Spacing points too far apart, making the glass less secure.
- Driving points at the wrong angle, reducing holding power.
- Using incompatible tools that damage the frame or point.
Taking your time and using the right technique will ensure a clean, safe, and long-lasting result.
When to Replace or Remove Glazier Points
If you’re restoring an old window or frame, you may need to remove existing glazier points. This should be done carefully to avoid splintering the frame or breaking the glass.
- Use a putty knife or pliers to gently lift old points.
- Discard rusted or bent points and replace them with new ones.
- Always replace glazing compound when reinstalling glass.
Reusing glazier points is not recommended, as they lose their grip and can become weak over time.
Learning how to use glazier points effectively is an important skill for anyone working with glass in frames, whether it’s for window repair or picture framing. These small tools play a big role in securing glass and supporting structural integrity. With the right tools, careful technique, and a bit of practice, you can confidently handle glass installations that are both safe and professional-looking. Always take safety precautions and ensure your work area is clean and stable to achieve the best results. By understanding the types, tools, and steps involved in using glazier points, you’ll be better equipped for successful glass projects of any size.