How To Beat Putrescent Knight
Facing the Putrescent Knight can be one of the most intense and punishing encounters in any action RPG. This grotesque, corrupted warrior is not just visually disturbing but mechanically brutal as well. With a combination of fast-paced melee strikes, wide-reaching area-of-effect attacks, and status ailments, the Putrescent Knight demands sharp reflexes, proper timing, and tactical patience. Whether you’re encountering this decaying knight in a cryptic dungeon or as a surprise optional boss, understanding how to beat Putrescent Knight is key to advancing your progress and proving your mettle as a player.
Understanding the Putrescent Knight
Who is the Putrescent Knight?
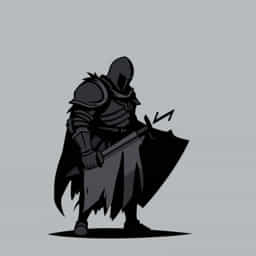
The Putrescent Knight is typically portrayed as an undead or plague-ridden enemy clad in broken armor, with twisted limbs and corrupted powers. While specific games may depict this knight differently, the archetype remains the same: a diseased, relentless foe that thrives on decay, poison, and overwhelming force.
This knight often appears in late-game content, and its lore usually ties into forgotten orders, failed holy crusades, or cursed lineages. Visually, it may be cloaked in tattered banners or wield weapons corroded by rot, adding to its dreadful atmosphere.
Where You Encounter the Putrescent Knight
The Putrescent Knight is usually found in environments like catacombs, plague-ridden arenas, or lost castles. Players often stumble upon this boss after unlocking hidden paths, completing side quests, or exploring cursed regions.
- Rotting Hall of Kings
- Desecrated Sanctuaries
- Plague-Touched Abyss
- Forgotten Tombs near the edge of the map
Boss Mechanics and Moveset
Phase One: Controlled Aggression
In the first phase, the Putrescent Knight’s moves are aggressive but readable. It often combines slashes, overhead strikes, and charge attacks. This phase is about teaching the player the boss’s rhythm.
- Plague Slash: A quick horizontal sweep that inflicts minor poison.
- Decay Stomp: A delayed stomp that creates a rot circle around the knight.
- Rust Barrage: Three fast forward thrusts with a corrupted blade.
Tips:
- Roll diagonally to avoid linear thrusts.
- Stick close to his side to bait whiffs.
- Use fast weapons or spells; slow attacks are easily punished.
Phase Two: Unleashed Rot
At half health, the knight will roar and shed part of his armor, revealing putrid flesh underneath. The arena darkens or becomes flooded with miasma, making visibility harder and his movements more erratic.
- Putrescent Burst: A radial explosion of rot that deals heavy damage and causes poison build-up.
- Rot Wings: Shadowy wings briefly sprout and slam the ground, sending shockwaves outward.
- Crippling Grasp: A grab attack that can instantly kill or severely injure unprepared players.
Tips:
- Time your rolls carefully after the roar the explosion follows a predictable delay.
- Watch his shoulders; they telegraph the direction of his wing slam.
- Use items or spells that resist poison and status effects before Phase Two begins.
Recommended Builds and Gear
Best Weapons to Use
- Fast Dex Weapons: Daggers, rapiers, or twinblades allow quick pokes between his attacks.
- Holy or Fire Damage: Most versions of the Putrescent Knight are weak to fire or divine magic.
- Ranged Spells: Sorceries or faith-based spells can help whittle him down before Phase Two.
Best Armor and Items
- Poison-Resistant Gear: Equip sets that offer high rot or plague resistance.
- Quick-Roll Build: Light armor can be useful for mobility rolling through attacks is safer than blocking.
- Antidote Consumables: Always carry poison-curing items, especially for Phase Two.
- Buffing Elixirs: Temporary boosts to stamina regen, defense, or resistance are critical.
Combat Strategy and Tips
1. Patience Over Aggression
The biggest mistake most players make is trying to be too aggressive. The Putrescent Knight punishes greedy combos. Limit yourself to 1-2 hits after dodging, then reset your position.
2. Stay Behind Him
Circling behind the knight opens up opportunities to land strikes safely. Just beware of his tail swipe or quick turn-around slashes in Phase Two.
3. Don’t Panic Roll
Because of his delayed attacks, it’s easy to dodge too early and get hit. Wait until his weapon is nearly touching you before rolling.
4. Learn the Tells
Each big move is preceded by a unique animation such as lifting his blade, hunching, or a quick shoulder twitch. Recognizing these cues can make the fight feel predictable.
Multiplayer and Summoning
If soloing the Putrescent Knight feels overwhelming, many games allow co-op or AI summons. Bringing allies can divide his attention and create more attack windows. However, bosses often gain more health in multiplayer, so coordination is key.
- Summon NPCs with high health or poison resistance.
- Use gestures or pre-fight plans to avoid overlapping roles.
- Have one player bait attacks while the others deal damage from behind.
After the Battle
Rewards
Defeating the Putrescent Knight usually grants high-value loot, including:
- A unique weapon forged from corrupted steel
- Rot-themed armor set
- Key to a hidden zone or forgotten tomb
- Soul or essence used for advanced spell crafting
Lore Unlocked
Beyond loot, the fight often reveals important lore about the land’s corruption, ancient wars, or divine failures. This makes the victory not just rewarding in gameplay, but also in storytelling.
The Putrescent Knight may be grotesque and ruthless, but like all great bosses, he’s a test of mastery. Learning his patterns, adapting your strategy, and staying calm in the face of decay are all part of the experience. Whether you defeat him on your first try or your twentieth, the sense of accomplishment is immense. With the right preparation, the proper mindset, and a touch of resilience, even the most putrid knight can be laid to rest.