How To Install Downdraft Vent
Installing a downdraft vent in your kitchen can dramatically improve ventilation without the need for an overhead range hood. These systems are sleek, modern, and ideal for island cooktops or areas where a traditional hood would disrupt the visual flow. Knowing how to install a downdraft vent properly is crucial to ensure it operates efficiently and safely. The process may seem complicated at first, but with careful planning, the right tools, and attention to detail, this home improvement task can be managed by many DIY enthusiasts.
Understanding Downdraft Ventilation Systems
A downdraft vent pulls smoke, steam, and odors downward from your cooktop, instead of letting them rise. It is often installed beside or behind the stove and is ducted to expel air outside. Some models are retractable and rise from the countertop when in use, while others are fixed in place. Before starting the installation, it’s essential to understand how your specific model operates and what its installation requirements are.
Benefits of a Downdraft Vent
- Improves kitchen air quality by removing fumes and odors at the source
- Space-saving and ideal for kitchen islands
- Sleek design complements modern kitchen aesthetics
- No bulky overhead range hood needed
Preparing for Installation
Preparation is a vital step in any appliance installation. You’ll need to ensure your kitchen layout can support a downdraft vent, both in terms of space and existing infrastructure. Some electrical and ductwork modifications may be required. Always consult the manufacturer’s guidelines before beginning any work.
Tools and Materials You May Need
- Tape measure
- Drill and screwdriver
- Jigsaw or reciprocating saw
- Level
- Ducting materials
- Flexible vent hose
- Aluminum tape
- Safety gear (gloves, goggles)
Check Local Building Codes
Before starting your downdraft vent installation, verify local building codes to ensure compliance. Some regions have specific requirements for ducting, exhaust placement, and electrical connections. Ignoring this step could lead to fines or the need to redo your work later.
Measuring and Cutting the Opening
Once you’re ready to install your downdraft vent, begin by measuring the exact location where the unit will be placed. Ensure there is enough space behind or beside the cooktop. Most downdraft vents require a few inches of clearance for the unit and ducting.
Steps to Measure and Cut
- Place the vent next to the cooktop in the desired position
- Mark the outline on the countertop or cabinet surface
- Use a jigsaw to cut the marked area carefully
- Ensure the edges are smooth and level to fit the unit snugly
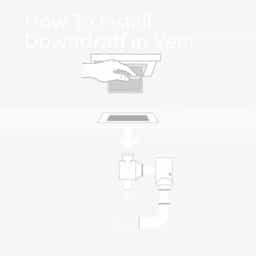
Installing the Downdraft Unit
After preparing the cutout, it’s time to install the downdraft vent into place. Follow the manufacturer’s guide precisely for your specific model. Carefully lower the unit into the cutout, ensuring it fits securely.
Securing the Unit
Use screws provided with the unit to secure it to the cabinet or countertop frame. Make sure the unit is perfectly level. A crooked installation can affect performance and aesthetics. Double-check the fit before proceeding to the next step.
Connecting the Ductwork
Ductwork is essential for guiding the air out of your kitchen. Downdraft vents typically require horizontal or downward duct routing, depending on your kitchen layout. This step may involve installing ducts through the cabinet base, floor, or walls.
Steps for Duct Installation
- Plan the shortest and most direct route to an exterior wall or floor vent
- Attach the flexible hose to the downdraft unit with a clamp or aluminum tape
- Connect the hose to the main duct line and secure all joints with aluminum tape
- Ensure the final exit point has a vent cap to prevent debris or pests from entering
Electrical Connections
Most downdraft vents require electricity to power the motor and controls. It’s important to ensure the power is turned off at the circuit breaker before handling any wires. If you’re not comfortable with electrical work, hire a licensed electrician.
Wiring the Unit
Locate the electrical junction box on the unit. Connect the black (hot), white (neutral), and green or bare (ground) wires to the corresponding wires from your power source. Use wire nuts and electrical tape to secure the connections. Once complete, close the junction box and restore power to test functionality.
Testing the Vent System
With everything in place, it’s time to test your downdraft vent. Turn it on and verify that the fan operates properly and that air is being pulled into the system. Place a piece of paper near the vent opening; if it’s drawn in, the suction is working correctly. Listen for unusual noises that could indicate loose parts or misaligned ductwork.
Troubleshooting Common Issues
- Weak suction: Check for duct leaks or obstructions
- No power: Inspect the circuit breaker and wiring connections
- Rattling noise: Ensure all screws and duct fittings are tightened
Maintenance Tips
To keep your downdraft vent functioning well, clean the filters regularly and check the ductwork for buildup. Grease and dust can reduce airflow efficiency over time. Replace or wash filters as recommended by the manufacturer.
Long-Term Performance
Regular maintenance extends the life of your downdraft vent. Schedule inspections every few months to make sure the system is clean and working properly. If you notice a drop in performance, inspect the unit before calling a professional.
Installing a downdraft vent is a practical and modern solution for improving kitchen ventilation, especially where traditional range hoods are not feasible. By following the steps for measurement, cutting, unit placement, ductwork, and electrical connections, you can complete this installation effectively. With attention to safety and maintenance, your downdraft vent will keep your kitchen air fresh and clean for years to come.