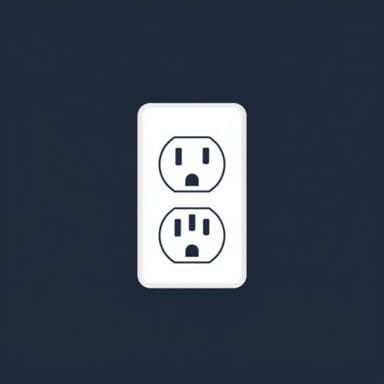
How To Unbend Outlet
Sometimes, electrical outlets become bent or misaligned due to frequent use, furniture pressure, or incorrect installation. A bent outlet can not only affect the appearance of your wall but also pose a safety risk. If your outlet looks crooked, leans forward, or appears recessed, it may be time to fix it. Fortunately, learning how to unbend an outlet doesn’t require expert-level skills. With a few tools and safety precautions, you can restore your outlet to its proper position safely and effectively.
Understanding Why Outlets Become Bent
Before you begin, it’s helpful to understand why outlets become bent in the first place. This can help prevent future damage.
- Loose electrical box: Over time, the box inside the wall that holds the outlet may shift or come loose.
- Overtightened screws: When outlet cover plates are installed too tightly, they can bend the outlet toward the wall or out of alignment.
- Furniture pressure: Heavy furniture pressing against plugs can distort the outlet position.
- Wear and tear: Repeated plugging and unplugging can loosen internal components, causing a crooked look.
Tools You’ll Need
Before attempting to unbend an outlet, gather the following tools to ensure a smooth and safe process:
- Flathead and Phillips screwdrivers
- Non-contact voltage tester
- Outlet spacers or washers (if needed)
- Needle-nose pliers
- Work gloves
Safety First: Turn Off Power
Whenever working with electricity, your safety should be your top priority. Never attempt to adjust an outlet without shutting off the power supply.
Steps to Shut Off the Power:
- Go to your home’s main electrical panel.
- Identify the breaker that controls the outlet you need to fix.
- Turn the breaker to the ‘off’ position.
- Use a non-contact voltage tester to double-check that the outlet is no longer live.
Always double-test with the voltage tester by inserting it into both slots of the outlet. If no light or sound is emitted, you are safe to proceed.
Remove the Outlet Cover
Once you’ve confirmed the power is off, use a screwdriver to remove the outlet’s faceplate. This will reveal the outlet and the screws holding it in place. Gently unscrew the mounting screws located at the top and bottom of the outlet.
Observe the Outlet’s Position
With the outlet loosened, take a moment to observe its orientation. Is the electrical box recessed too far into the wall? Are the outlet tabs bent or misaligned? These observations will guide your next steps in unbending the outlet.
Fixing a Recessed or Bent Outlet
If the outlet is leaning backward into the wall, or the cover plate won’t sit flush, spacers are your solution.
Installing Outlet Spacers:
- Buy plastic or rubber outlet spacers from a hardware store.
- Place them behind the outlet’s mounting ears to bring it forward.
- You can stack spacers if needed, but make sure the outlet remains securely screwed in.
If the outlet is leaning sideways, check that both mounting screws are tight and evenly adjusted. Often, uneven tightening causes one side of the outlet to protrude more than the other.
Using Washers as an Alternative
If spacers aren’t available, small washers can serve as a makeshift solution. Slide them over the screws between the outlet tab and the box until the outlet sits flush and straight. Don’t overtighten the screws, as this could crack the outlet or strip the threading.
Adjusting Bent Outlet Tabs
If the metal mounting tabs on the outlet are bent, use needle-nose pliers to gently reshape them. Do this carefully to avoid weakening or snapping the metal. Recheck alignment before reattaching the outlet to the box.
Straightening a Tilted Outlet
Sometimes, the outlet appears twisted or crooked. This is usually due to the way it was installed. To correct this:
- Loosen both mounting screws slightly.
- Manually adjust the outlet to a straight position.
- Hold it in place and retighten the screws gradually and evenly.
- Check that it sits firmly without wobble.
Take your time during this step to get a visually level appearance. Using a small level can be helpful for precise alignment.
Replace the Faceplate
Once the outlet is firmly and correctly positioned, replace the faceplate. Screw it in carefully to avoid cracking plastic or shifting the outlet’s alignment again. Hand-tighten instead of using power tools for better control.
Restore Power and Test
After reinstalling the faceplate, go back to the breaker panel and turn the power back on. Use a device such as a lamp or phone charger to test the outlet. Confirm that both slots and the ground port are functioning correctly.
When to Call a Professional
In most cases, a bent outlet is a simple DIY fix. However, if you notice any of the following, call a licensed electrician:
- Burn marks or buzzing sounds coming from the outlet
- Loose wires or exposed metal parts inside the box
- The electrical box is damaged or detached from the wall stud
- You feel unsure about safely handling the electrical components
It’s always better to be cautious when dealing with home electrical systems. A professional can quickly resolve deeper issues without risking safety.
Tips to Prevent Future Outlet Misalignment
To avoid needing to unbend outlets repeatedly, take these preventive measures:
- Use outlet extenders when installing thick wall plates or paneling
- Secure electrical boxes firmly to wall studs during renovations
- Avoid pulling cords out at an angle always remove plugs straight
- Keep furniture and heavy items away from wall outlets
Knowing how to unbend an outlet is a valuable home maintenance skill. It not only improves the appearance of your walls but also ensures your electrical system remains safe and functional. By following proper safety protocols and using the right tools, most minor outlet issues can be corrected in under 30 minutes. Regular inspections and a bit of care can go a long way in preserving your outlets for years to come.