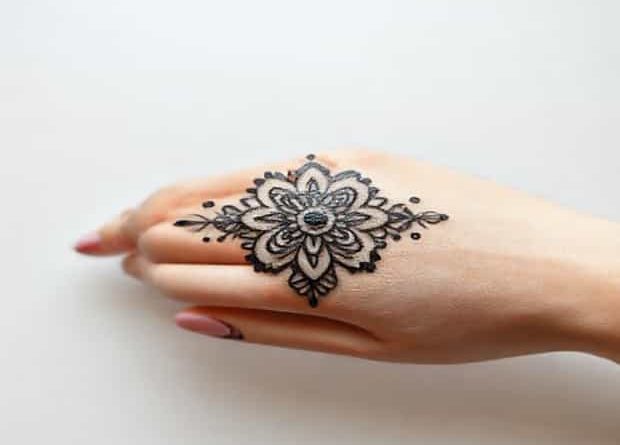
Kano Sellotape Henna Design Simple
Creating beautiful henna designs can sometimes feel intimidating, especially for beginners who want clean, symmetrical patterns without spending hours perfecting each line. This is where the Kano sellotape henna design simple technique comes into play. By combining everyday materials like sellotape with traditional henna cones, anyone can achieve elegant and precise designs. This method is particularly useful for crafting geometric patterns, borders, or even floral motifs with sharp edges. Beyond convenience, it allows beginners and enthusiasts to experiment with creativity while maintaining control over the final outcome.
What is the Kano Sellotape Henna Design Simple Technique?
The Kano sellotape henna design simple technique involves using small pieces of sellotape to outline areas of the skin where henna will be applied. The tape acts as a stencil, creating straight lines, clean edges, or repeated patterns that would otherwise be difficult to achieve freehand. Once the henna is applied over the tape and allowed to partially dry, the tape is removed, leaving crisp, well-defined designs. This technique is particularly suitable for simple henna patterns, such as stripes, chevrons, and minimalistic floral shapes.
Why Use Sellotape for Henna Designs?
Using sellotape as a tool for henna offers several advantages
- PrecisionIt helps create clean edges and straight lines that are hard to achieve freehand.
- Time-savingBeginners can achieve professional-looking results quickly.
- CreativityThe tape allows for experimentation with geometric shapes and repetitive patterns.
- VersatilityIt can be used on various parts of the body, including hands, arms, feet, and even smaller areas like fingers.
Materials Needed for Simple Henna Designs Using Sellotape
To try the Kano sellotape henna design simple technique, you need a few basic materials that are easy to find. These include
- Henna cone or pre-mixed henna paste
- Sellotape or masking tape
- Scissors to cut the tape into desired shapes
- Optional fine brush or toothpick for detailing
- Moisturizer or lemon-sugar solution for aftercare
Having these materials ready ensures a smooth application process and enhances the clarity and longevity of the henna design.
Step-by-Step Guide to Simple Kano Sellotape Henna Designs
Using the Kano sellotape method, you can create impressive henna patterns even if you are a beginner. The process is straightforward and encourages experimentation
Step 1 Clean the Skin
Start by washing the area where the henna will be applied. Removing oils, dirt, and sweat ensures better adhesion of the tape and prevents smudging. Pat the skin dry thoroughly before applying any tape or henna.
Step 2 Apply the Tape
Cut the sellotape into the desired shapes, such as strips, triangles, or simple geometric patterns. Stick the tape gently onto the skin, pressing lightly to avoid air bubbles. Make sure the edges are firmly attached to prevent henna from seeping underneath.
Step 3 Apply Henna Over the Tape
Using a henna cone, apply the paste over the taped area. Fill in patterns or cover edges that need precise lines. You can use additional tape to create layered effects or to add complexity to simple designs. The thickness of the henna application affects the darkness of the final stain, so apply evenly.
Step 4 Wait and Dry
Allow the henna to partially dry before removing the tape. This usually takes 10-15 minutes for thin designs. Avoid smudging the paste during this period. The longer the henna stays on the skin, the darker the stain will be, so patience is key.
Step 5 Remove the Tape
Carefully peel off the sellotape to reveal clean, crisp edges. Avoid pulling too quickly, which might distort the design. After removing the tape, let the henna dry completely. Applying a lemon-sugar mixture can help deepen the color and improve longevity.
Step 6 Aftercare
Once the henna is dry, scrape off the remaining paste without using water immediately. Avoid washing the area for a few hours to allow the stain to oxidize and darken. Applying natural oils like coconut or olive oil can help preserve the design and enhance the richness of the color.
Design Ideas Using Kano Sellotape Method
The simplicity of this technique allows for endless creativity. Some easy design ideas include
- Striped patterns on fingers or arms
- Chevron designs along the back of the hand or foot
- Minimalist floral shapes with straight edges
- Geometric frames around circular or mandala motifs
- Layered patterns combining triangles, squares, and lines
Tips for Beginners
For those new to henna and tape designs, consider these tips
- Practice on paper or a practice hand before applying on skin.
- Use short pieces of tape for curves and angles to maintain flexibility.
- Start with simple patterns and gradually experiment with layering and complexity.
- Keep the henna paste fresh and smooth to avoid clumps.
Advantages of the Kano Sellotape Technique
This method is particularly useful for those who want precision without investing heavily in stencils or advanced tools. It encourages experimentation and allows for a clean, professional look even with simple designs. The technique is also adaptable for various occasions, from casual body art to festive henna for weddings and cultural celebrations.
Combining with Freehand Designs
The Kano sellotape henna design simple approach can also be mixed with freehand drawing. After creating a structured base using tape, you can add delicate lines, dots, or additional floral elements freehand. This combination results in visually interesting patterns that are both structured and organic, offering a unique aesthetic.
The Kano sellotape henna design simple technique provides an accessible and effective way to achieve clean, elegant, and creative henna patterns. By using everyday materials like sellotape alongside traditional henna cones, beginners and experienced artists alike can explore geometric shapes, minimalistic designs, and layered patterns with precision. This approach not only simplifies the process but also encourages experimentation, helping artists create professional-looking results with minimal effort. Whether for personal enjoyment, special occasions, or cultural celebrations, this technique makes beautiful henna designs more approachable and versatile than ever before.