Zero Correction For Dc Ammeter
The concept of zero correction for a DC ammeter is essential for ensuring accurate measurements in electrical systems. When measuring current, even a small deviation in the meter’s pointer at zero can lead to incorrect readings. This adjustment process ensures that when no current flows through the circuit, the ammeter needle precisely rests at the zero mark. It’s a small detail, but it has a big impact on precision in laboratory experiments, industrial setups, and electronic device testing.
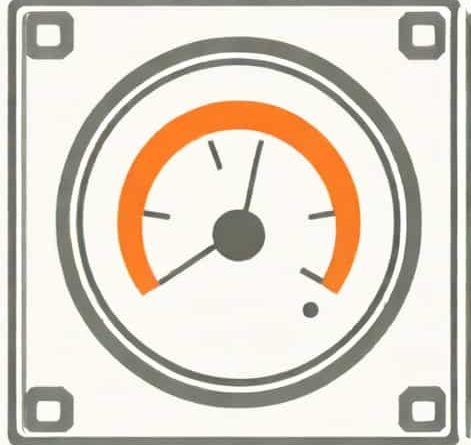
Understanding the DC Ammeter
A DC ammeter is an instrument used to measure direct current (DC) flowing through a circuit. It is typically connected in series so that the same current passes through the meter. The internal mechanism of a DC ammeter often includes a moving coil, a permanent magnet, and a pointer that indicates current on a calibrated scale. Because ammeters measure current directly, any internal error or mechanical shift can result in inaccurate readings.
Over time, mechanical stress, temperature fluctuations, or magnetic field changes can cause the pointer of a DC ammeter to rest away from the true zero point even when no current is applied. That’s where the concept of zero correction becomes critical.
What Is Zero Correction?
Zero correction refers to the process of adjusting the pointer of an ammeter so that it correctly indicates zero when no current flows. This ensures that subsequent readings are accurate and not offset by a false baseline. Without zero correction, the ammeter might show a small positive or negative reading even when the circuit is open or the current is zero.
The correction is usually made using a small screw or knob located at the front of the meter. By rotating it gently, the operator aligns the pointer exactly with the zero mark on the scale. This procedure is simple but should be performed carefully to avoid damaging the sensitive mechanical components inside.
Why Zero Correction Is Important
Accuracy in electrical measurement is crucial. Even minor errors can lead to incorrect calculations of resistance, power, or voltage when applying Ohm’s law or other circuit analysis techniques. If an ammeter reads slightly above zero at rest, every measurement will include that offset error. For example, a 0.2 A false reading on a 5 A range might seem small, but in sensitive circuits, it can make a noticeable difference.
- It ensures accuracy in current measurement.
- It prevents cumulative errors in multi-step calculations.
- It improves the reliability of experimental results.
- It helps maintain consistency in calibration and testing environments.
Causes of Zero Error in DC Ammeters
Zero error occurs when the needle does not align with the zero mark even when no current is flowing. This can happen for several reasons related to mechanical, magnetic, or environmental factors. Understanding these causes helps in maintaining the ammeter properly.
1. Mechanical Shocks
DC ammeters are delicate instruments. A sudden jerk, fall, or even frequent movement can shift the alignment of the needle. Over time, this can cause the pointer to rest off zero.
2. Temperature Effects
Changes in ambient temperature can expand or contract the materials inside the ammeter. This thermal expansion can slightly alter the tension in the control springs or the shape of the moving coil, leading to zero error.
3. Magnetic Interference
External magnetic fields from nearby electrical equipment can affect the permanent magnet inside the meter. This influence can distort the magnetic field lines that the moving coil depends on, causing the pointer to deviate.
4. Aging and Wear
Over time, components inside the ammeter-such as springs, pivots, and bearings-wear out. This mechanical fatigue can shift the balance and result in small but significant errors that require zero correction.
Procedure for Zero Correction
The process of zero correction for a DC ammeter is straightforward but must be done carefully. The following steps outline the standard procedure used by technicians and engineers
- Ensure the ammeter is disconnected from any circuit before adjustment.
- Place the ammeter on a flat, stable surface to avoid movement during calibration.
- Observe the pointer position. If it is not resting exactly at zero, locate the zero-adjusting screw or knob.
- Using a small screwdriver, gently rotate the screw until the pointer aligns precisely with the zero mark.
- Recheck the alignment after tapping the meter lightly to ensure stability.
- Once adjusted, reconnect the ammeter and verify accurate readings with a known current source.
Types of Zero Error
There are two primary types of zero errors observed in DC ammeters
Positive Zero Error
In this case, the pointer rests above the zero mark when no current is flowing. This means the ammeter will always indicate a slightly higher current than the actual value.
Negative Zero Error
Here, the pointer rests below the zero mark. As a result, the ammeter shows a reading that is less than the true current value.
Both errors are equally undesirable, and zero correction ensures that neither type affects the accuracy of the readings.
Practical Example of Zero Correction
Consider a laboratory setting where a student uses a DC ammeter to measure the current through a resistor. Before taking any readings, the student notices that the pointer is slightly above zero, showing 0.1 A even though the circuit is open. If this error is ignored, all subsequent readings will include that 0.1 A as an offset. By adjusting the zero correction screw, the pointer can be brought back to zero, ensuring accurate measurement.
Maintaining Accuracy Over Time
Regular maintenance of electrical measuring instruments, including ammeters, helps in keeping them reliable. Performing zero correction before each use is a good habit, especially in environments where instruments are used frequently or exposed to vibration and temperature changes.
- Check zero position before each experiment or measurement.
- Store ammeters in protective cases when not in use.
- Keep them away from strong magnetic fields.
- Calibrate the instrument periodically against a standard reference.
Modern DC Ammeters and Automatic Zero Adjustment
In modern electronic ammeters, digital correction systems are often used. These instruments automatically detect and compensate for small offsets using internal circuitry. However, analog meters still require manual zero correction because their readings depend entirely on mechanical alignment and magnetic balance. Despite the rise of digital alternatives, analog DC ammeters remain popular in education and industry due to their simplicity and real-time visual feedback.
Zero correction for a DC ammeter might seem like a small adjustment, but it is essential for achieving precision in current measurement. By ensuring that the pointer rests exactly at zero before each reading, users can eliminate systematic errors and maintain reliable results. Whether in educational labs, industrial testing, or engineering applications, understanding and applying zero correction helps uphold the accuracy and integrity of electrical measurements.
As technology advances, the principle of zero correction remains a cornerstone of instrument accuracy, reminding users that even in the age of automation, attention to small details is what ensures perfect measurement.